The Ultimate Guide to Patio Construction: Building Your Perfect Outdoor Sanctuary
Building a patio construction project is about more than just pouring concrete or laying down some bricks. It’s about reclaiming your backyard and extending your living room into the open air. I’ve seen homeowners transform neglected patches of dirt into vibrant social hubs where memories are made over grilled steaks and late-night conversations.
If you’re looking to dive into patio construction, you aren’t just starting a DIY project; you’re making a long-term investment in your property’s value and your own quality of life. This guide will walk you through every nuance—from the initial dirt work to the final sweep of the polymeric sand—ensuring your space stands the test of time. Quality patio construction requires a blend of artistic vision and engineering precision.
Planning Your Patio Construction: The Blueprint for Success
Before you even touch a shovel, you need a plan. Most patio construction failures don’t happen during the build; they happen in the “I’ll figure it out as I go” phase. Think of your patio construction as a puzzle where every piece—drainage, utility lines, and sun exposure—must fit perfectly.
Why is Site Selection the Most Critical Step?
You might have a “vision” of where the patio construction should go, but the land often has other ideas. You need to account for the natural “fall” of your yard. Water is the mortal enemy of any patio construction masonry work. If your patio construction isn’t graded to slope away from your foundation at a rate of at least 1/8 inch per foot, you’re inviting a flooded basement.
Beyond water, consider the sun. A south-facing patio construction area in July can feel like an oven without a pergola or umbrella. Conversely, a northern orientation might stay damp and grow moss. Walk your yard at different times of the day to see where the light actually hits your intended patio construction site.
What Permits Do I Need for Patio Construction?
This is where many DIYers get tripped up. While a simple “on-grade” patio construction (one that sits flush with the ground) often doesn’t require a permit in many jurisdictions, things change the moment you add electricity for lighting, a gas line for a fire pit, or a retaining wall over three feet high.
Always check with your local building department before starting your patio construction. It’s much cheaper to pay a $50 permit fee now than to pay a $500 fine and be forced to tear out $2,000 worth of stone later. Professional patio construction always starts with legal compliance.
Choosing the Right Materials for Patio Construction: Aesthetics vs. Durability
Your choice of material dictates the vibe, the cost, and the maintenance schedule of your patio construction space. There is no “perfect” material—only the one that fits your specific climate and lifestyle.
Natural Stone: The Timeless Choice
Flagstone, slate, and bluestone are the gold standards for high-end patio construction. No two pieces are the same, giving your patio construction an organic, “always been there” feel. Natural stone is incredibly durable for patio construction, but it’s also the most labor-intensive to install because the thicknesses vary. You’ll spend hours “buttering” the back of stones to get them level during your patio construction.
Pavers: The Modern Workhorse
Concrete pavers have come a long way in the world of patio construction. Today, they can mimic the look of aged brick or tumbled travertine. The real advantage here is the interlocking system used in modern patio construction. Pavers are designed to flex with the freeze-thaw cycle of the ground, making them ideal for patio construction in colder climates where solid concrete would inevitably crack.
Poured Concrete: The Budget-Friendly Canvas
Standard broom-finish concrete is a common patio construction option, but it lacks personality. If you go this route, I highly recommend stamped or stained patio construction. You can achieve the look of stone at a fraction of the cost. However, be warned: concrete patio construction will crack. It’s not a matter of “if,” but “when.” Control joints help manage where those cracks happen in your patio construction, but they are never invisible.
The Foundation: Why Dirt Work is Everything in Patio Construction
If you take away one thing from this guide, let it be this: patio construction is only as good as the hole it sits in. You can buy the most expensive stones for your patio construction, but if they sit on top of soft, uncompacted soil, your patio construction will be wavy and uneven within two seasons.
How Deep Should You Dig for a Patio Construction?
The standard depth for a residential patio construction is usually between 7 and 9 inches. This allows for:
-
4–6 inches of compacted gravel (the structural base for patio construction).
-
1 inch of coarse sand (the bedding layer).
-
2–3 inches for the actual paver or stone used in your patio construction.
The Science of Soil Compaction in Patio Construction
Don’t just walk on the dirt to pack it down during your patio construction. Rent a plate compactor from a local hardware store. Run it over the sub-base of your patio construction until it feels like concrete. Professional patio construction contractors use the “thumb test”—if you can’t push your thumb into the soil, your patio construction is ready. If you skip this, the first heavy rain will cause the soil to settle, and your patio construction will follow suit.
Advanced Drainage Strategies for Patio Construction
Water management is the “secret sauce” of professional patio construction. You need to think about where the water goes when it leaves the surface of your patio construction.
Utilizing French Drains and Catch Basins
If your patio construction is located at the bottom of a slope, you need a way to intercept runoff. A French drain—a perforated pipe buried in a trench of gravel—can redirect water around the patio construction. For larger surfaces, installing a subtle “trench drain” or “deco drain” along the edge of the house is a smart move during patio construction to protect your foundation.
What is a Permeable Patio?
In recent years, permeable patio construction has exploded in popularity. Instead of using sand and tight joints, this patio construction uses specialized pavers and small “open” stones in the gaps. This allows rainwater to soak directly through the patio construction into the ground. It’s environmentally friendly, reduces puddling on your patio construction, and is a modern staple of sustainable patio construction.
Step-by-Step Installation: From Stakes to Stones
Once the planning and digging are done, the actual patio construction build begins. This is the most rewarding part of patio construction, but it requires precision.
Step 1: Layout and Excavation
Use batter boards and mason line to mark your patio construction perimeter. Dig out the area, ensuring you account for the “over-dig”—you should dig 6 inches beyond the actual patio construction edge to provide room for restraints.
Step 2: Adding the Base Material
Fill the patio construction hole with “3/4-minus” crushed stone. This is a mix of 3/4-inch rocks and fine “crusher run” dust. Wet it slightly as you compact it in 2-inch lifts during your patio construction. This creates a solid foundation.
Step 3: Screeding the Sand
This is where the magic happens in patio construction. Lay down two 1-inch pipes as “rails” and pull a straight board across them to level your sand for the patio construction. Once you’re done, do not walk on the sand. This is your perfectly flat bed for your patio construction.
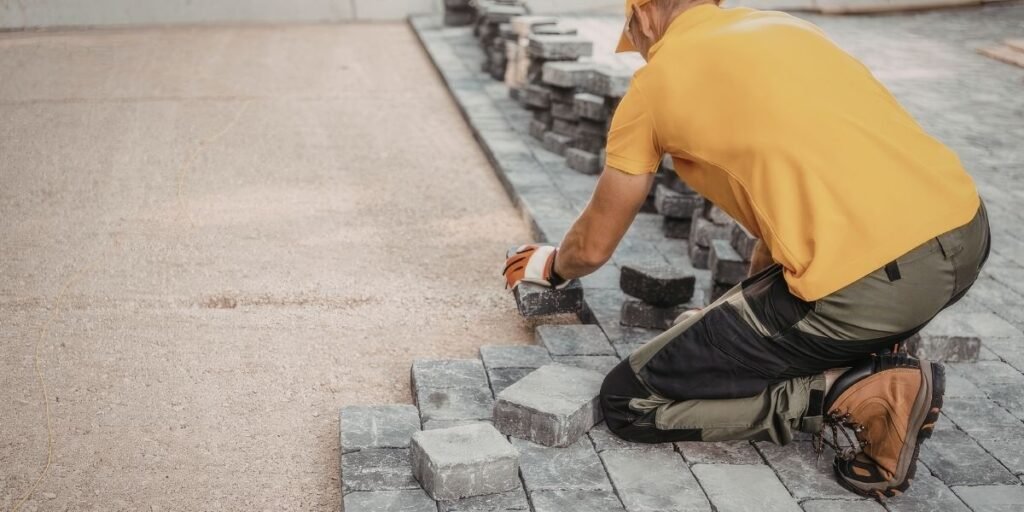
Step 4: Laying the Pavers
Start from a 90-degree corner (usually the house) for your patio construction and work your way out. Place the stones straight down; don’t slide them, or you’ll ruin your patio construction sand bed. Use a rubber mallet to set them firmly into your patio construction.
Step 5: Cutting and Edging
You will inevitably have to cut stones to fit your patio construction borders. Use a wet saw with a diamond blade for the cleanest results in your patio construction. Once the field is laid, install plastic or metal edge restraints to keep the patio construction from “creeping” outward over time.
Finishing Touches: Lighting and Landscaping Your Patio Construction
A patio construction project isn’t finished until the atmosphere is right. Soft lighting can turn a daytime deck into a nighttime oasis.
Integrated Hardscape Lighting
Modern patio construction often involves “undercap” lights—small LEDs that tuck under the lip of a sitting wall or stair tread. They provide a warm, indirect glow that highlights the texture of your patio construction stone without blinding your guests.
Choosing Heat Sources: Fire Pits vs. Fireplaces
Should you go with a built-in fire pit or a full masonry fireplace for your patio construction?
-
Fire Pits: Great for 360-degree social interaction and a cost-effective patio construction add-on.
-
Fireplaces: Act as a visual focal point and a windbreak, providing a more “architectural” feel to the patio construction.
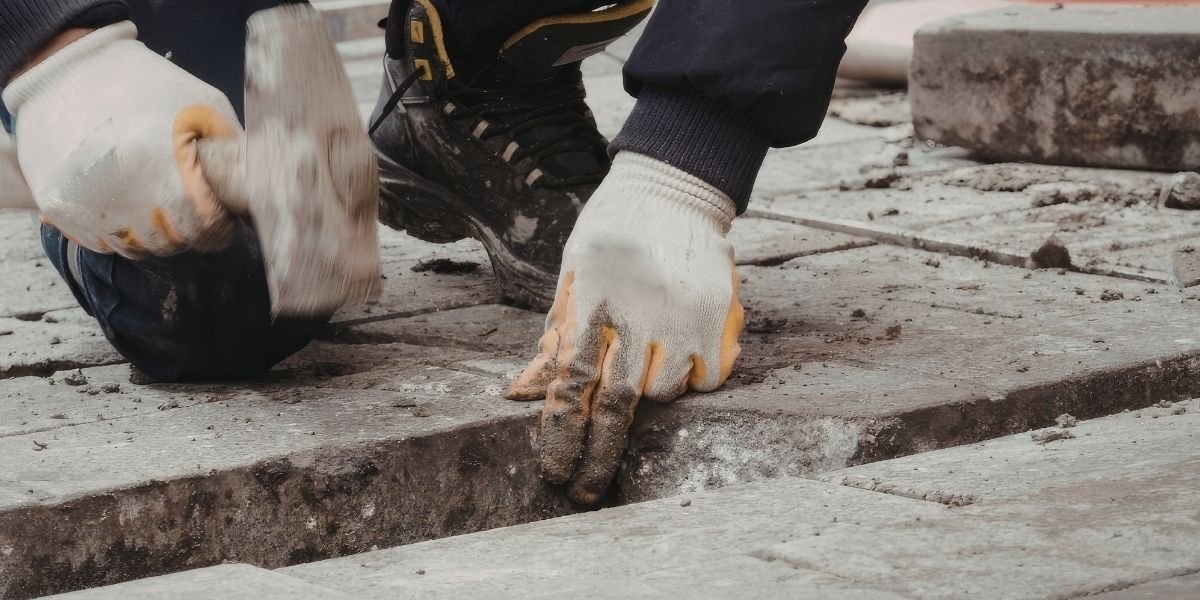
Maintenance: Protecting Your Patio Construction Investment
Even the best-built patio construction needs a little love. If you ignore your patio construction for five years, weeds will take over the joints, and the stone will lose its luster.
The Power of Polymeric Sand
Unlike regular sand, polymeric sand contains “binders” that turn into a glue-like substance when wet. It hardens in the patio construction joints, preventing weeds from growing and ants from nesting. If your patio construction joints look empty, top them off with fresh polymeric sand to maintain the patio construction‘s structural integrity.
Should You Seal Your Patio Construction?
Sealing isn’t mandatory, but it’s highly recommended for natural stone and paver patio construction. A good sealer protects your patio construction against oil stains from the grill and UV fading from the sun. Think of it like wax on a car; it makes cleaning your patio construction much easier and keeps the colors “popping.”
Frequently Asked Questions (FAQ) about Patio Construction
How much does patio construction cost per square foot?
On average, expect to pay between $15 and $35 per square foot for professional patio construction. DIY patio construction projects can cost as little as $5 to $10 per square foot, primarily covering materials and tool rentals.
How long does it take to finish patio construction?
For a standard 15×15 foot paver patio construction, a professional crew can usually finish in 3 to 5 days. A DIYer working on weekends should plan for about two full weekends for their patio construction.
Can I build a patio construction over an existing concrete slab?
Yes, this is called “overlaying.” You can thin-set stone or use “paver overlays” directly on top of concrete during your patio construction, provided the existing slab is structurally sound.
What is the best material for patio construction in a rainy climate?
Permeable pavers or natural flagstone with wide, well-draining joints are excellent choices for patio construction in rainy areas. They prevent standing water on the patio construction.
Is a gravel patio a good permanent patio construction option?
Gravel is the most affordable patio construction method, but it’s high maintenance. It tends to travel into the grass and needs to be leveled frequently. It’s a great “temporary” patio construction solution.
Practical Takeaways for Your Project
Successful patio construction is an exercise in patience and physics. If you focus on the foundation, respect the flow of water, and choose materials that match your climate, your patio construction will end up as a space that looks as good in ten years as it does on day one.
Start small if you’re a beginner at patio construction, or hire a pro for the heavy lifting of excavation. Either way, the moment you sit down on your new patio construction with a cold drink, you’ll realize every sore muscle was worth it.